

In the world of low-cost carriers (LCCs), Jetstar frequently rolls out unbeatable promotional fares across domestic routes in Japan. Whether flying Osaka to Sapporo, Sapporo to Tokyo, or less-frequented destinations like Takamatsu and Oita, or Kumamoto (immensely popular in Taiwan thanks to the Kumamon mascot), one-way domestic airfares can often drop to astonishingly low bargain prices.
Today, Mizuc will walk you through, step by step from scratch, how to snag these ultra-cheap flight tickets directly on Jetstar’s Japanese website.
Step 1: Search for Promotional Routes
Unlike in the past when booking budget flights required piecing together each segment manually, Jetstar’s promotional campaign portal provides a very handy search tool (see Figure 1 below).
 Figure 1: Jetstar promotional route search interface.
Once you select your departure city, destination, travel month, and preferred price tier on the search interface, the system automatically displays all suitable flights (shown in Figure 2 below), clearly listing travel validity periods and prices.
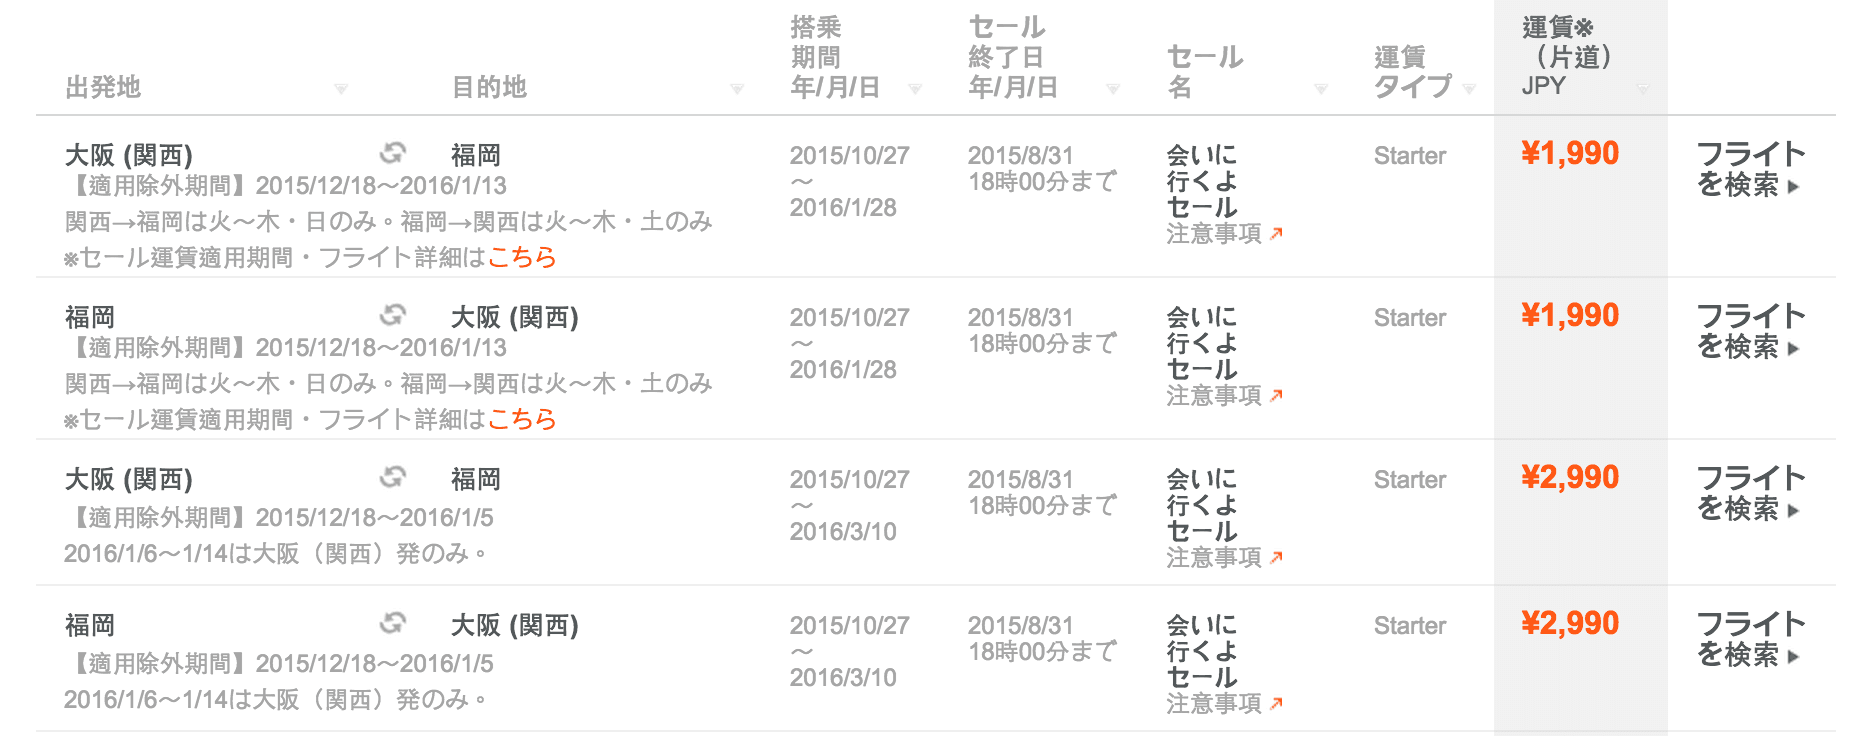 Figure 2: Domestic route search results.
After identifying your desired route in Figure 2 (such as Tokyo to Sapporo), click the search button at the far right of that row. A detailed flight search window will pop up (Figure 3), allowing you to choose between round-trip (往復) or one-way (片道).
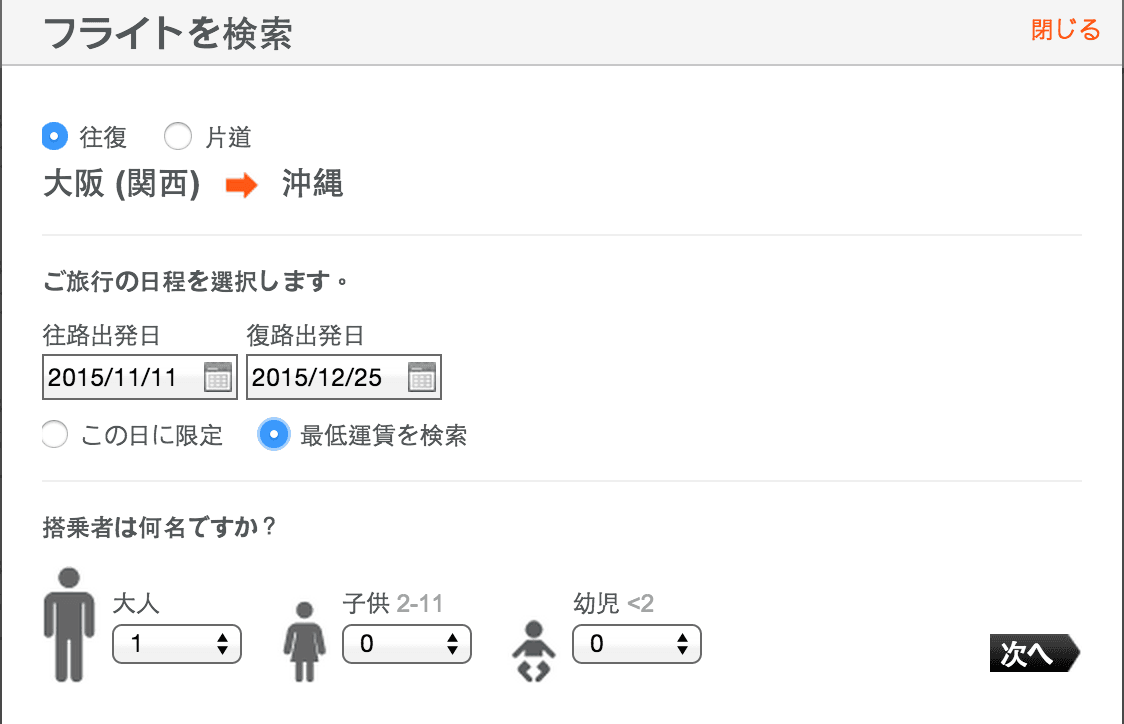 Figure 3: Detailed flight search interface.
Step 2: Enter the Jetstar Booking Flow
Clicking the forward arrow in Figure 3 takes you straight into the booking portal shown in Figure 4.
Mizuc’s Tip: The reservation system has a strict session timeout. If you spend too much time reviewing flight details, the system will kick you out!
Taking the Osaka to Okinawa flight as an example, you will see a morning departure at 09:30 and an afternoon flight at 14:25, with a flight duration of 2 hours and 15 minutes. Pick whichever fits your personal travel style (if you prefer sleeping in at your hotel, opt for the afternoon flight).
Furthermore, Jetstar displays fares across a full 7-day window simultaneously, allowing budget-minded travelers to adjust their dates flexibly to grab the cheapest price.
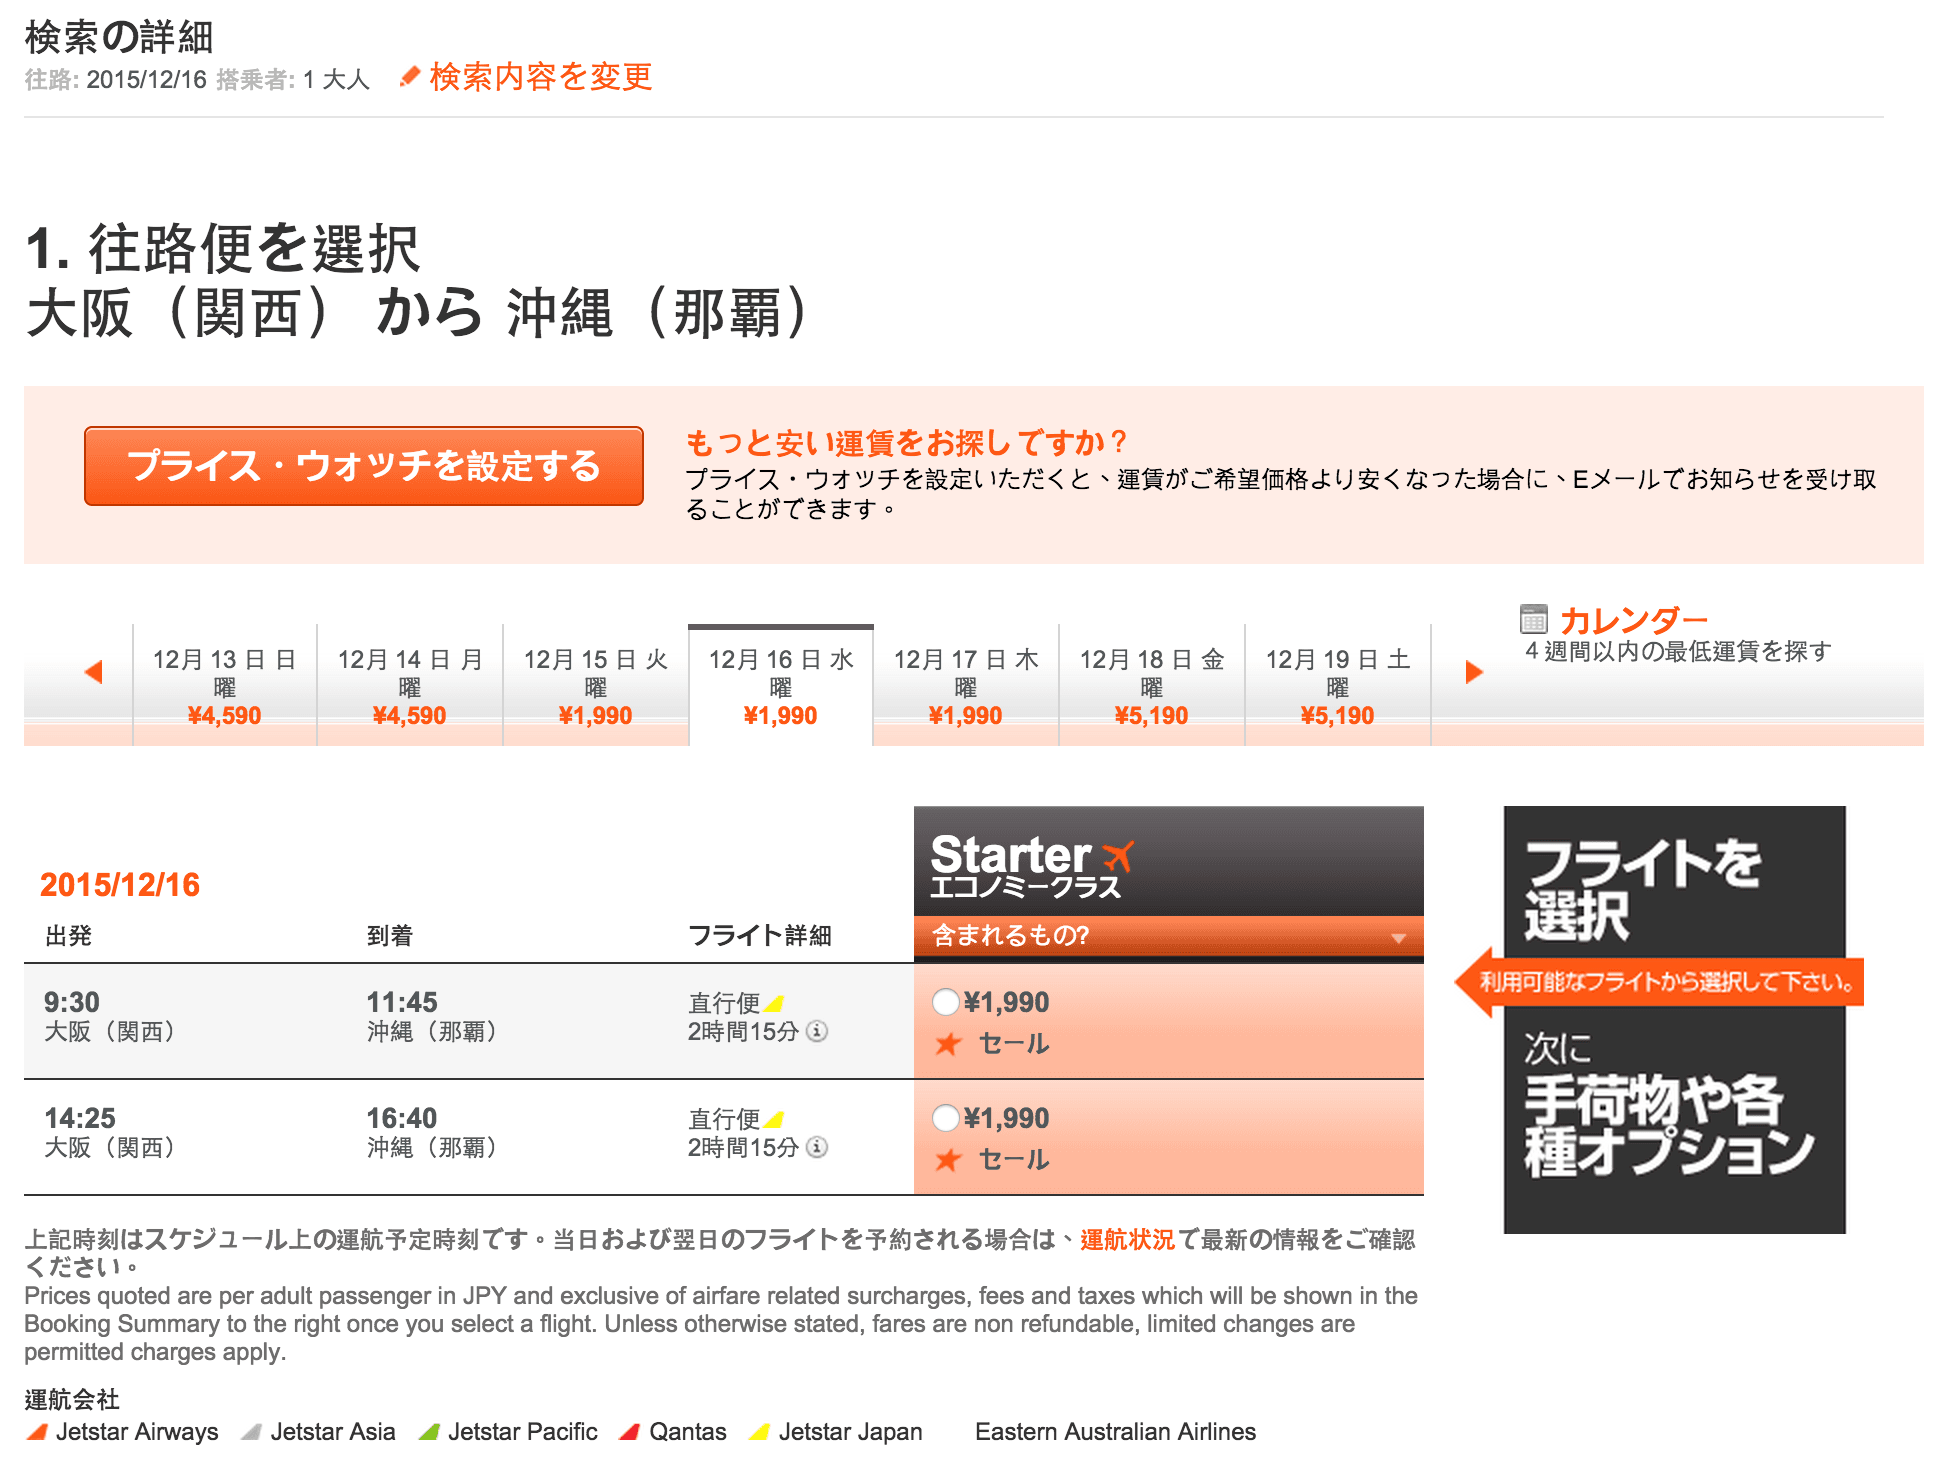 Figure 4: Jetstar flight itinerary selection page.
Next, scroll down to the defining feature of low-cost carriers: “Add-ons” (which is essentially how budget airlines generate their primary revenue).
The first screen (Figure 5) asks whether you wish to purchase checked baggage. If you opt for the Plus package (JPY 1,450), you receive up to 10 kg of checked baggage in addition to the standard Starter allowance of 7 kg carry-on luggage.
As for the Max package at JPY 13,990, it is well outside our budget backpacker philosophy, so we can safely skip past it!
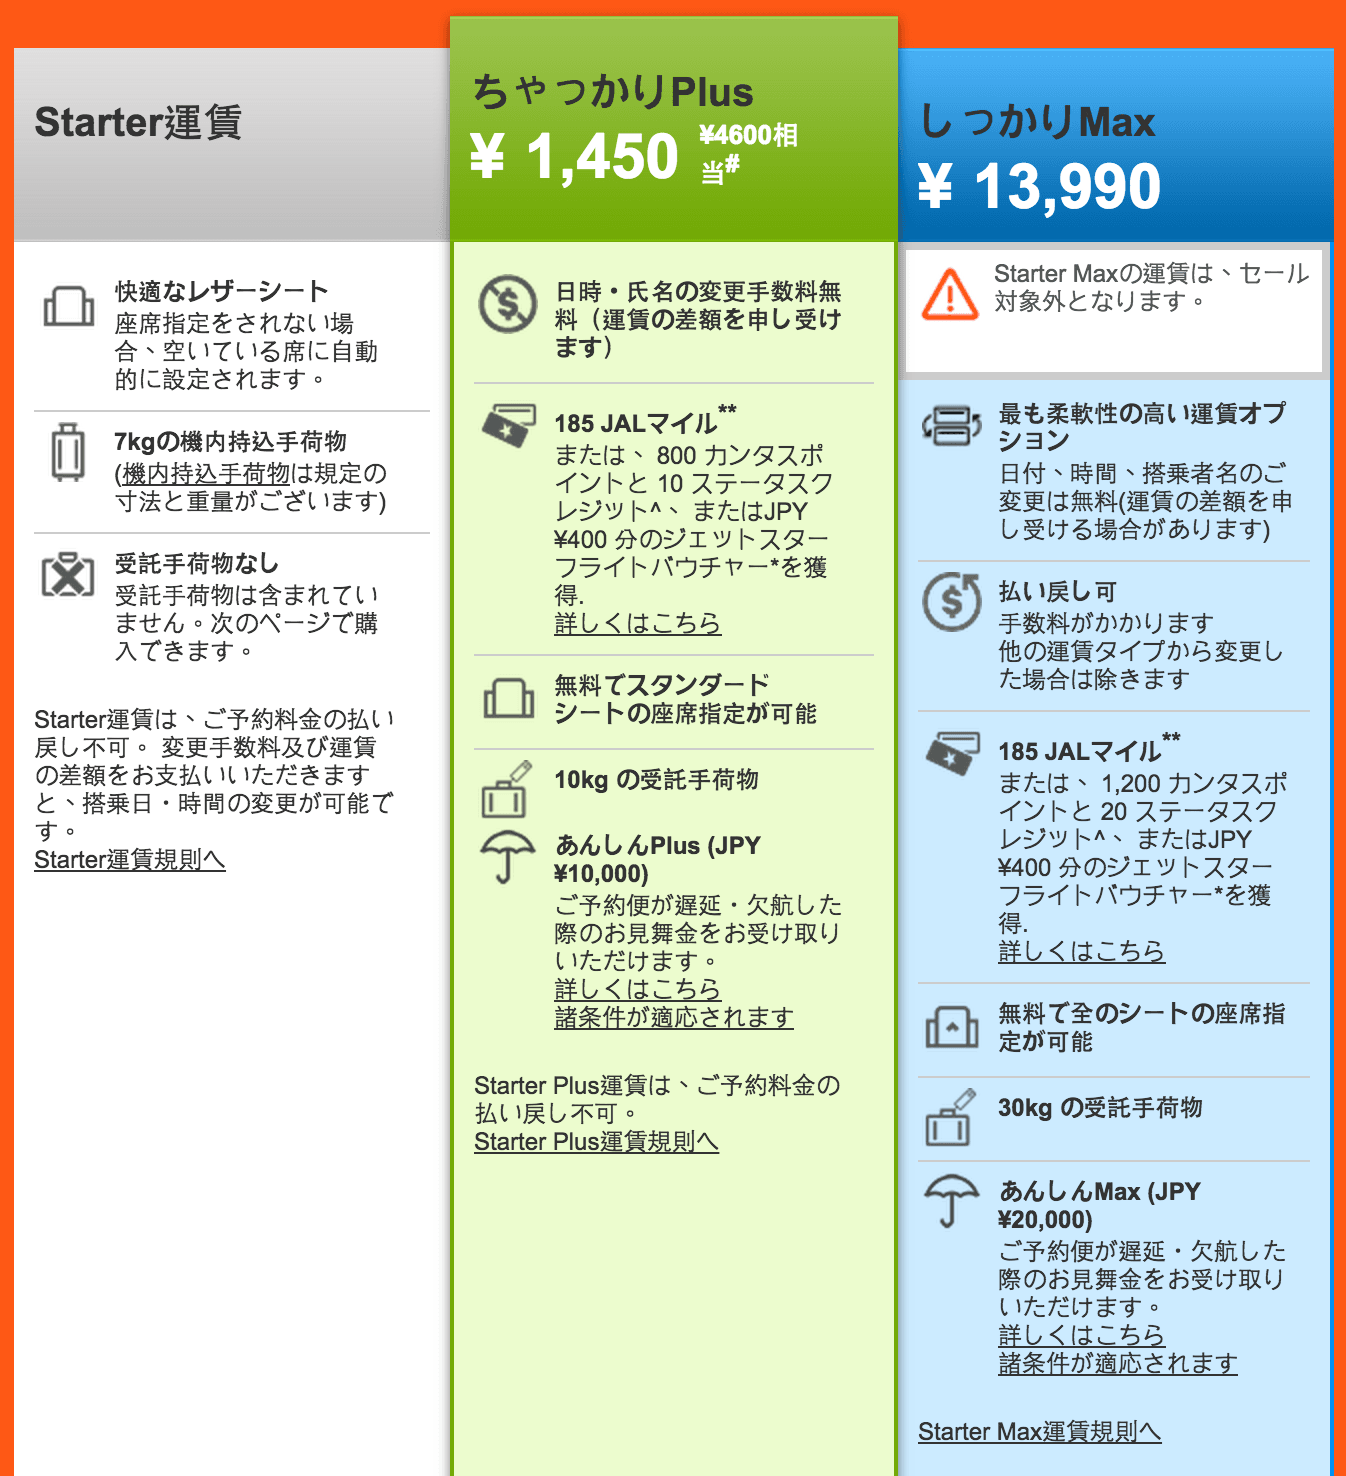 Figure 5: Add-on package options.
If you decline all add-ons and scroll straight to the bottom, you will arrive at the summary confirmation screen shown in Figure 6.
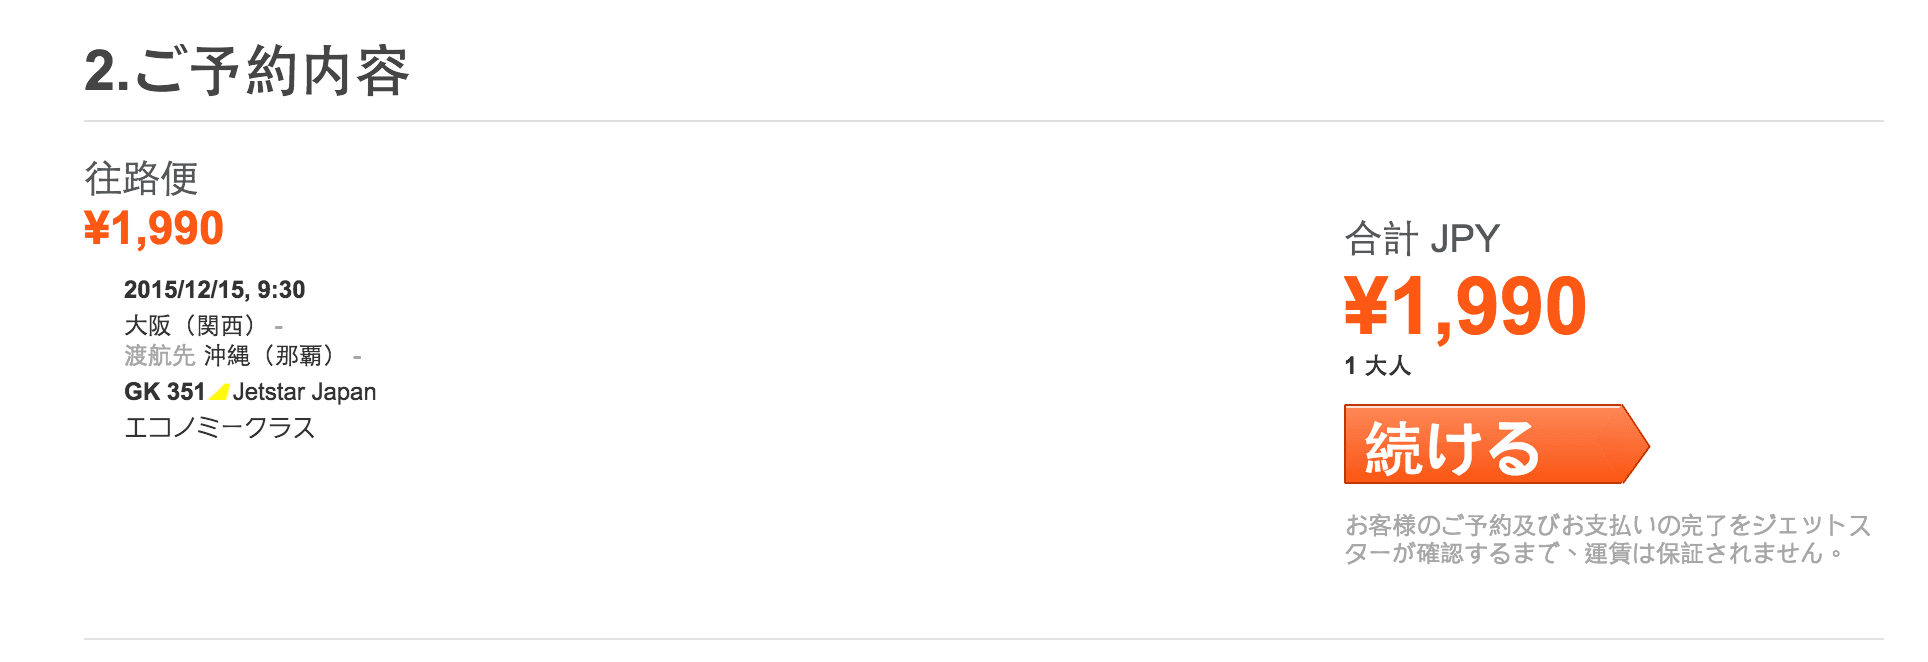 Figure 6: Booking reservation summary confirmation.
Step 3: Seat Selection
If you bypassed all optional extras up to this point, your ticket price remains at the rock-bottom promo rate of JPY 1,990. However, because I love sitting by the window to take aerial photos of the clouds, I usually don’t mind letting the airline earn a tiny bit extra.
As shown in Figure 7 below, seat selection is broken down into three pricing tiers: Red seats for JPY 460, Green seats for JPY 670, and the most spacious Blue seats for JPY 980. Backpackers typically go for the cheapest option—domestic flights only take an hour or two anyway. The main consideration is simply whether you prefer a window or an aisle (just avoid middle seats if you can).
Pro Tip: Picking seats immediately behind partition markers or near emergency exits is often an excellent choice, such as Row 7.
Note: Unless I misread the Japanese prompt at the time, proceeding to the next step required selecting a seat (even though I originally wanted to test checkout with the absolute lowest bare fare).
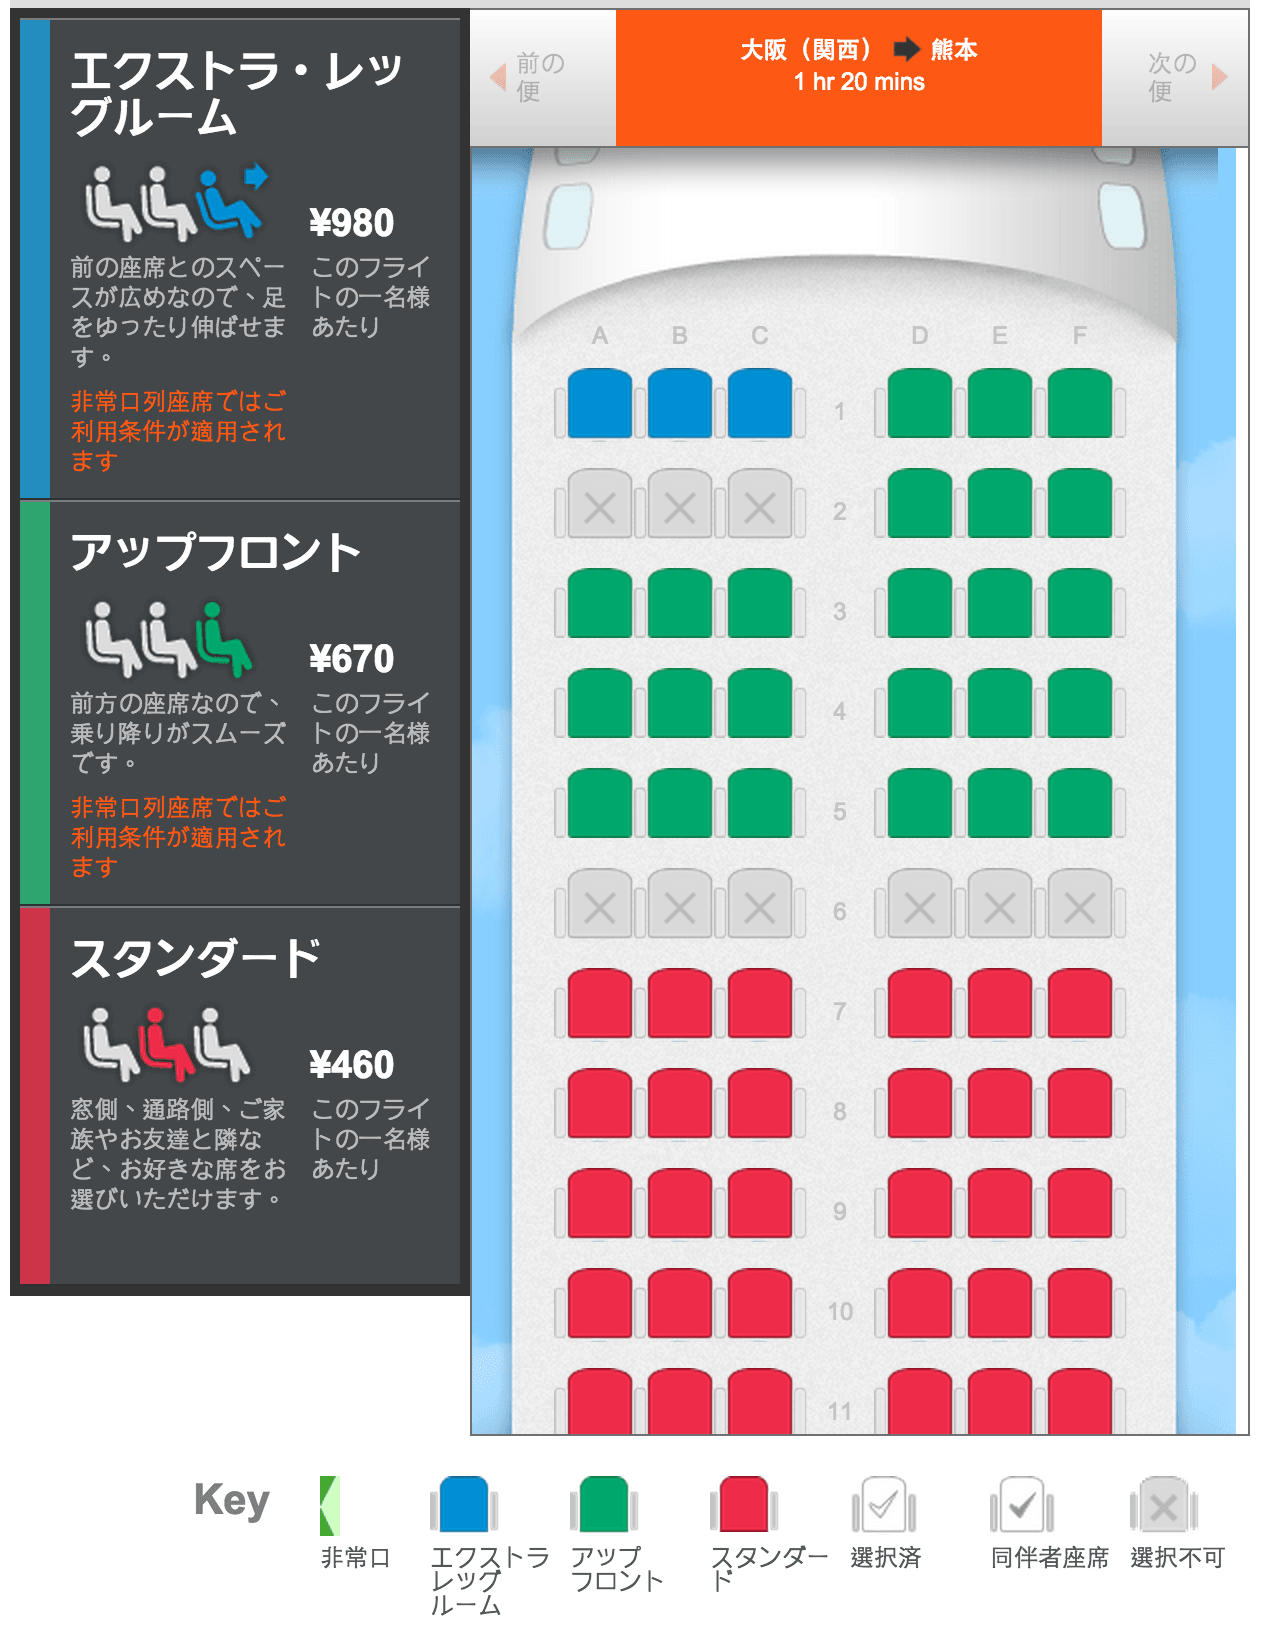 Figure 7: Paid seat selection interface.
Once seat selection is complete, you are directed to the checkout page shown in Figure 8. Jetstar supports credit card payments via VISA, MasterCard, and JCB, though payment processing fees may apply (for example, VISA incurred a JPY 430 processing surcharge).
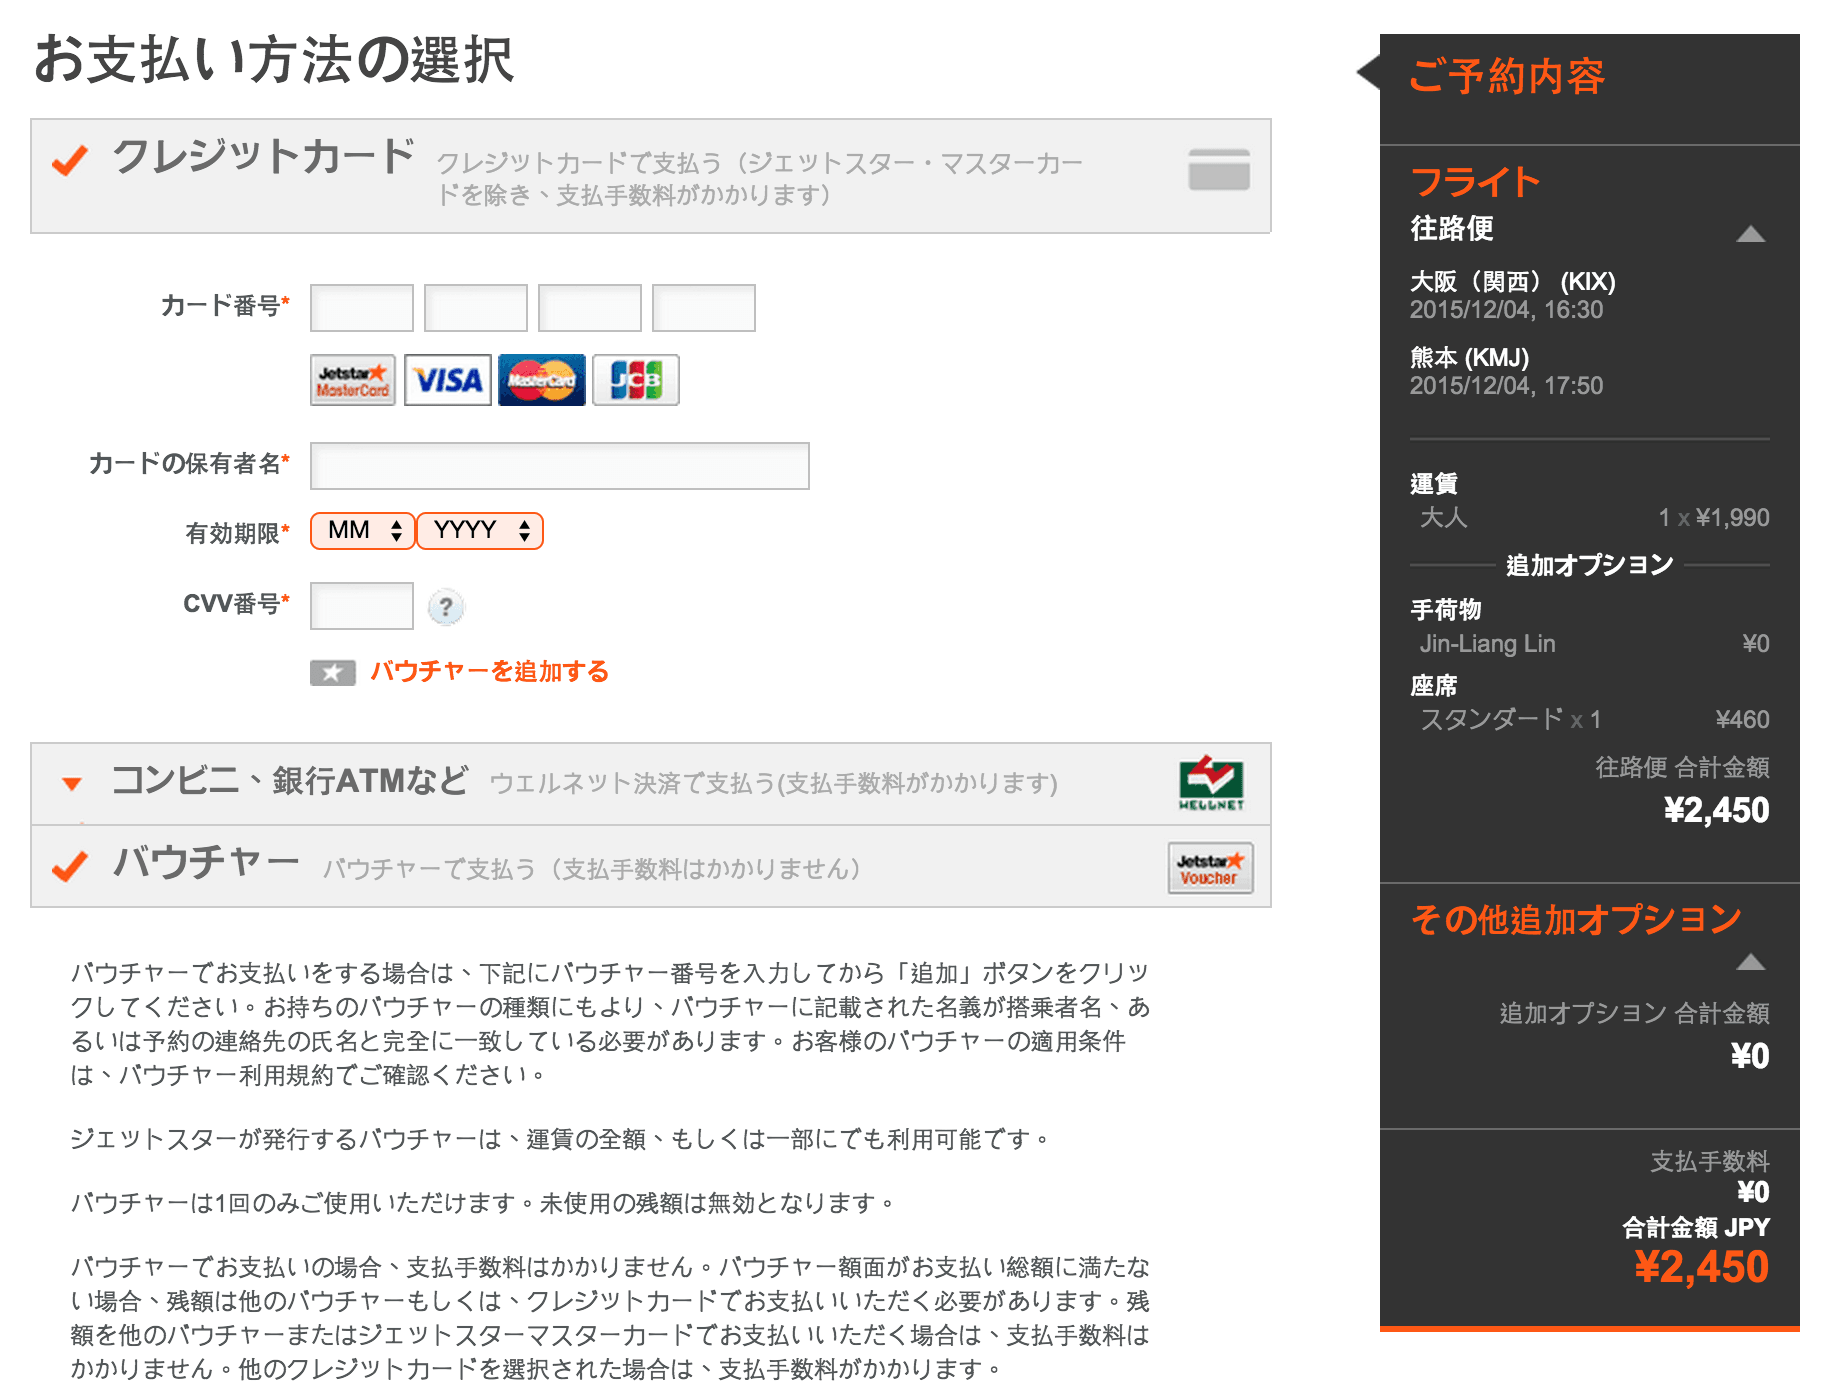 Figure 8: Checkout page.
After the system successfully authorizes your credit card payment, it displays the final transaction breakdown for your review.
In Figure 9, you can see the total final fare was JPY 2,880 (JPY 1,990 airfare + JPY 460 seat fee + JPY 430 credit card processing fee).
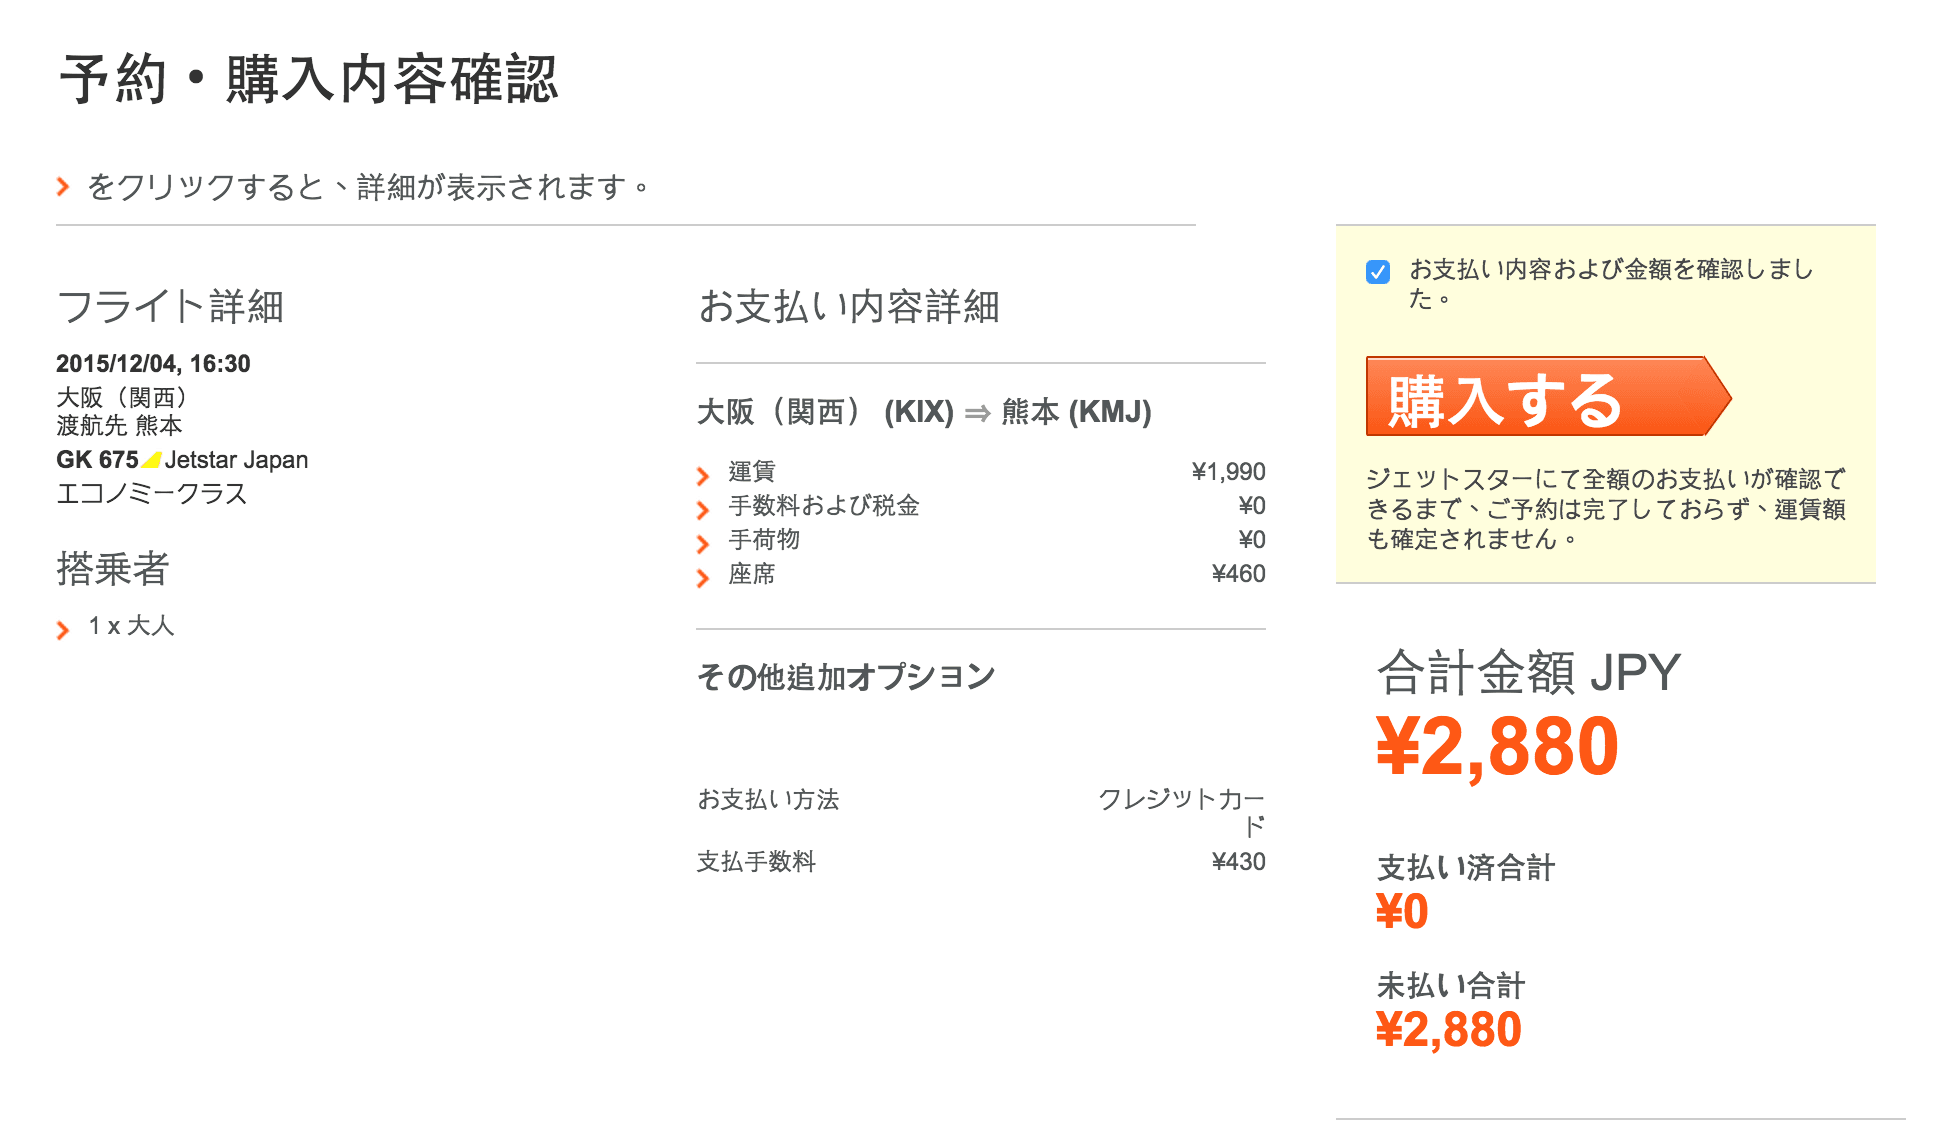 Figure 9: Final ticket purchase confirmation.
Now comes the final step. Once payment processing finishes, the system generates a unique “Booking Reference” (shown inside the yellow box in Figure 10). When traveling, arrive at the airport counter at least two hours prior to departure and present this booking code to ground staff to collect your boarding pass. (Although not explicitly mandated in the confirmation email, Mizuc strongly advises always bringing the original credit card used for the booking to the airport to avoid any potential check-in issues.)
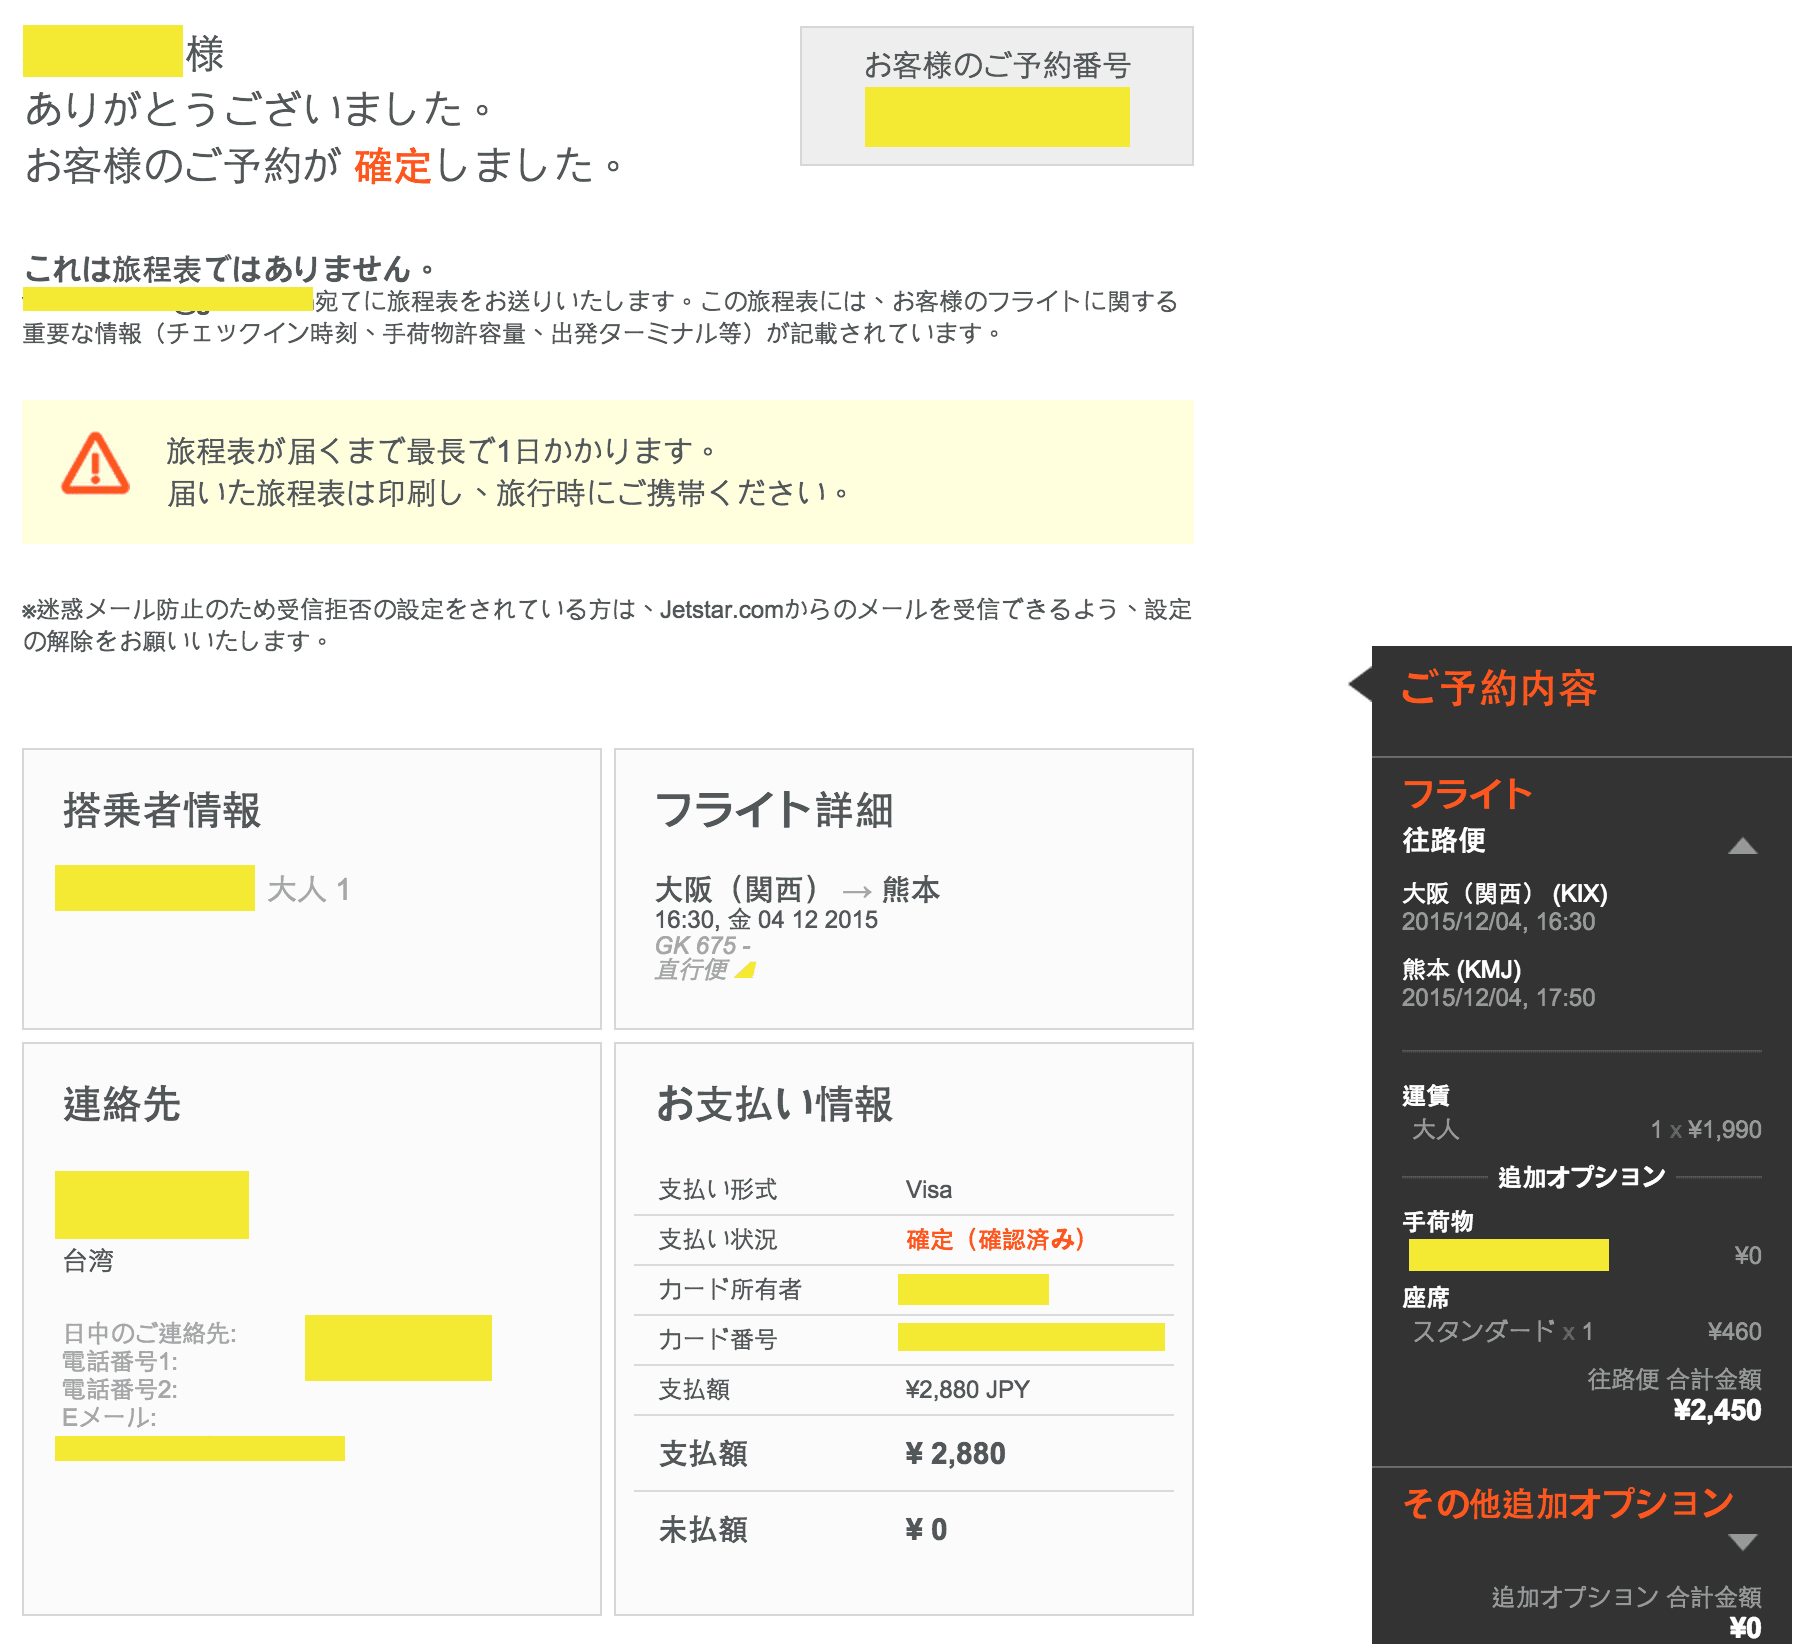 Figure 10: Complete order details and booking reference code.
References
- Jetstar Airways: Official promotional website for Japan domestic routes.
- Search and discount bookings for Japanese minshuku (guesthouses) and hotels.
Support Independent Perspectives & In-Depth Insights
Every thoughtful analysis and candid critique comes from our dedication to truth and quality. We choose not to follow sensational algorithms or clickbait headlines.
Sustaining independent research requires reader support. Make a one-time or monthly contribution, securely processed by Google.
Payments secured by Google · Manage or cancel anytime in your Google Account



Comments