

當您在 macOS 上首次嘗試使用 git push 將程式碼推送至 GitHub 時,會經常遇到要求輸入帳號密碼的提示。這是由於 GitHub 於 2021 年後已停止支援傳統的密碼驗證方式。
本文將詳細介紹多種解決方案,並提供最優化的設定流程。
問題背景
為什麼需要身份驗證?
- GitHub 需要確認您的推送權限
- 傳統密碼驗證已被淘汰,安全性不足
- 每次手動輸入憑證影響開發效率
支援的驗證方式
- Personal Access Tokens (PAT) – 替代密碼
- SSH 金鑰 – 更安全且便捷
- GitHub CLI – 官方命令行工具
解決方案一:使用 Personal Access Tokens
步驟 1:生成 Personal Access Token
- 登入 GitHub 帳戶
- 點擊右上角頭像 → Settings
- 左側選單選擇 Developer settings
- 選擇 Personal access tokens → Tokens (classic)
- 點擊 Generate new token → Generate new token (classic)
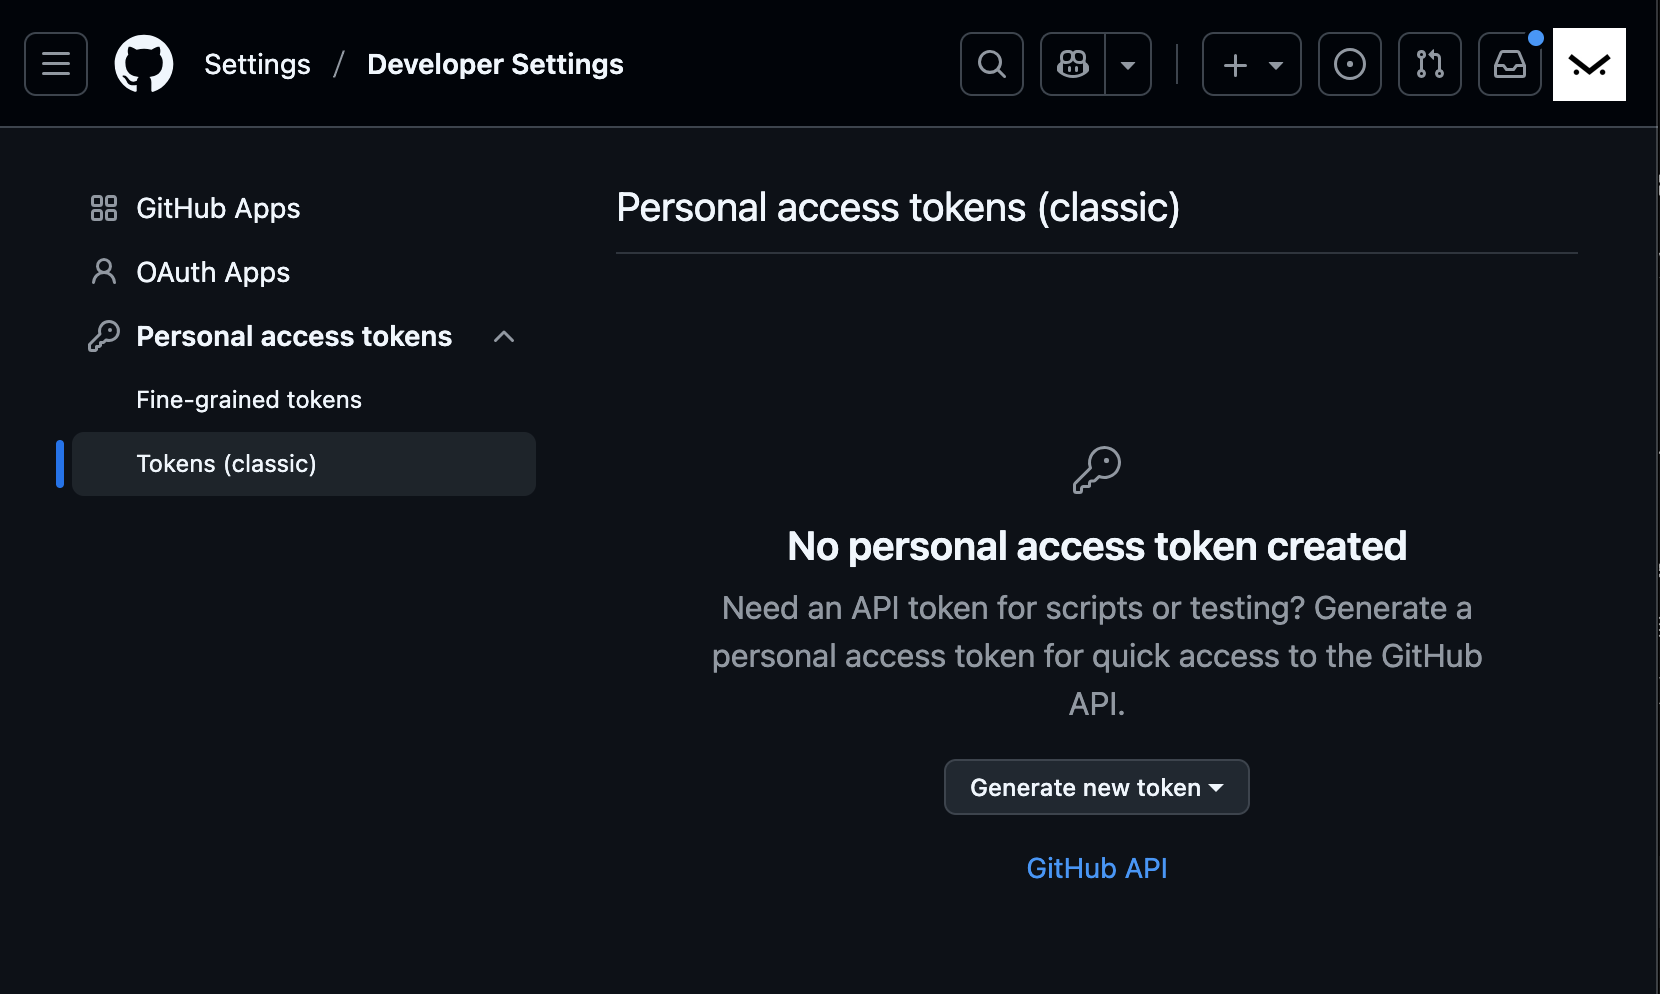
步驟 2:設定 Token 權限
Note: "MacBook Pro 開發憑證"  # 識別名稱
Expiration: 推薦選擇 90 天或 1 年
Scopes: 至少勾選:
  - repo (完整倉庫權限)
  - workflow (如果需要 GitHub Actions)
步驟 3:儲存並使用 Token
# 首次使用時,用 token 代替密碼
git push origin main

# 系統提示時:
# Username: 輸入您的 GitHub 用戶名(例如我們家的 mountos)
# Password: 貼上剛才生成的 token(非密碼)
解決方案二:設定憑證儲存助手
啟用 macOS Keychain 整合
# 設定 Git 使用 macOS 鑰匙圈儲存憑證
git config --global credential.helper osxkeychain

# 驗證設定
git config --global --get credential.helper
首次使用與儲存
# 執行 push 操作
git push origin main

# 輸入用戶名和 token 後,系統會提示:
# "是否要將憑證儲存至鑰匙圈?"
# 選擇"永遠允許"或"允許"
管理已儲存的憑證
# 查看鑰匙圈中的 Git 憑證
security find-internet-password -s github.com

# 如果需要刪除舊憑證
security delete-internet-password -s github.com
解決方案三:SSH 金鑰驗證(推薦長期使用)
步驟 1:生成 SSH 金鑰對
# 使用更安全的 Ed25519 算法
ssh-keygen -t ed25519 -C "[email protected]"

# 或使用傳統 RSA(如遇相容性問題)
ssh-keygen -t rsa -b 4096 -C "[email protected]"

# 保存路徑使用預設即可(~/.ssh/id_ed25519)
步驟 2:將公鑰添加到 GitHub
# 複製公鑰內容到剪貼板
pbcopy < ~/.ssh/id_ed25519.pub

# 或手動顯示並複製
cat ~/.ssh/id_ed25519.pub- 訪問 GitHub → Settings → SSH and GPG keys
- 點擊 New SSH key
- 標題:識別此電腦(如 “MacBook Pro”)
- 金鑰類型:保持 Authentication Key
- 貼上公鑰內容
步驟 3:設定倉庫使用 SSH
# 檢查當前遠端地址
git remote -v

# 如果顯示 https 地址,切換為 SSH
git remote set-url origin [email protected]:username/repository.git

# 驗證變更
git remote -v
# 應該顯示:origin [email protected]:username/repository.git (fetch)
#          origin [email protected]:username/repository.git (push)
步驟 4:測試 SSH 連接
# 測試 SSH 連接
ssh -T [email protected]

# 成功時會顯示:
# "Hi username! You've successfully authenticated..."
解決方案四:使用 GitHub CLI
安裝與設定
# 使用 Homebrew 安裝
brew install gh

# 登入 GitHub
gh auth login

# 跟隨互動式指引:
# ✓ What account do you want to log into? GitHub.com
# ✓ What is your preferred protocol for Git operations? SSH 或 HTTPS
# ✓ Authenticate Git with your GitHub credentials? Yes
# ✓ How would you like to authenticate? Login with a web browser
使用 GitHub CLI 操作
# 克隆倉庫(自動設定認證)
gh repo clone username/repository

# 進入倉庫目錄
cd repository

# 進行修改後推送
git add .
git commit -m "提交訊息"
git push  # 無需額外認證
疑難排解
常見問題與解決方法
1. 憑證仍然要求輸入
# 清除快取憑證
git credential-osxkeychain erase
host=github.com
protocol=https

# 或重新設定遠端地址
git remote set-url origin https://[email protected]/username/repository.git
2. SSH 連接失敗
# 測試 SSH 連接詳細資訊
ssh -Tv [email protected]

# 檢查 SSH 代理
ssh-add -l

# 添加金鑰到代理
ssh-add ~/.ssh/id_ed25519
3. 多帳戶切換
# 為不同倉庫設定不同用戶
cd /path/to/project
git config user.name "公司用戶名"
git config user.email "[email protected]"

# 回到個人項目
cd /path/to/personal-project
git config user.name "個人用戶名"
git config user.email "[email protected]"
最佳實踐建議
安全性考量
- Personal Access Tokens:
- 設定合理的過期時間
- 僅授予必要權限
- 定期輪換更新
- SSH 金鑰:
- 為金鑰設定強密碼
- 使用 SSH 代理管理金鑰
- 定期審查已授權的金鑰
開發效率優化
# 全域設定用戶資訊(替換為您的資訊)
git config --global user.name "您的姓名"
git config --global user.email "您的[email protected]"

# 設定預設分支名稱
git config --global init.defaultBranch main

# 啟用彩色輸出
git config --global color.ui auto
團隊協作設定
# 設定推送行為(推薦)
git config --global push.default simple

# 啟用自動設定上游分支
git config --global branch.autoSetupMerge always
總結
根據使用情境選擇最適合的方案:
- 臨時專案:使用 Personal Access Tokens + 鑰匙圈儲存
- 長期開發:設定 SSH 金鑰驗證(最推薦)
- 頻繁的 GitHub 操作:使用 GitHub CLI
透過正確的身份驗證設定,您可以在 macOS 上享受無縫的 Git 推送體驗,同時確保程式碼的安全性與開發效率。
發佈留言